- ReiBoot
- 4uKey
- UltData
- iCareFone for WhatsApp Transfer
- 4MeKey
- 4uKey for Android
- iAnyGo - iOS Location Changer
- UltData for Android
- ReiBoot for Android
- iCareFone
- 4uKey - Password Manager
- TunesCare
- TunesCare for Mac
- 4uKey - iTunes Backup
- 4WinBoot
- Windows Rescure
- Password & Key Recovery
- Data Recovery
- Disk Tools
- 1. Create a Bootable Disk
- 2: Boot Your PC from the Bootable Disk
- 3: Clone Entire Disk
- 4: Clone One Partition
- 5: Back up Disk
- 6. Back up Partition
- 7. Restore Disk
- 8. Restore Partition
- 9. Create a Partition
- 10. Format a Partition
- 11. Delete a Partition
- 12. Resize a Partition
- 13. Wipe a Partition
- 14. Wipe Specific Folders
- 15. Wipe Files
- How to Boot from CD/USB?
- How to Boot from USB in UEFI BIOS?
How to Use Tenorshare UltData - Mac Data Recovery
Tenorshare UltData - Mac is the professional yet easy software to recover any kinds of files including photos, videos, documents and others on your Mac hard drive or external disks. Check this detailed guide and learn how to recover lost or deleted files on Mac.
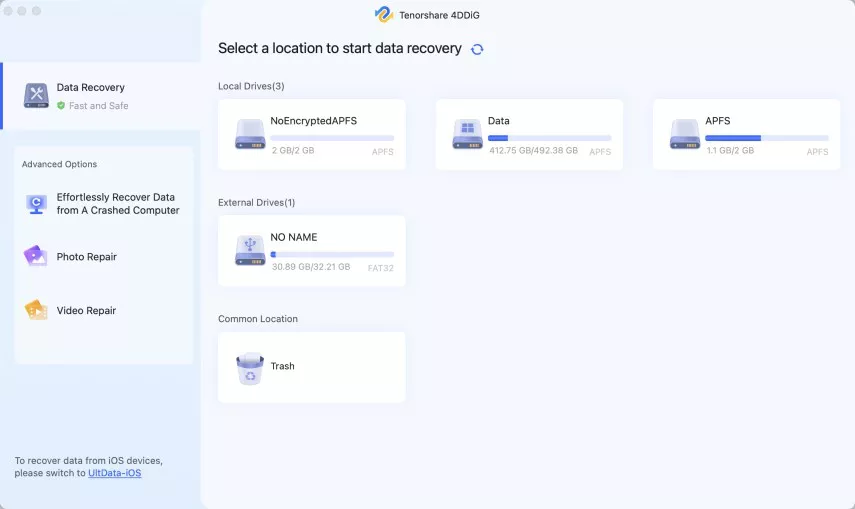
Step 1: Select a Location
Launch UltData - Mac after installation and select a location like your hard drive to start Mac data recovery. Then click "Scan" button to start looking up all lost files.


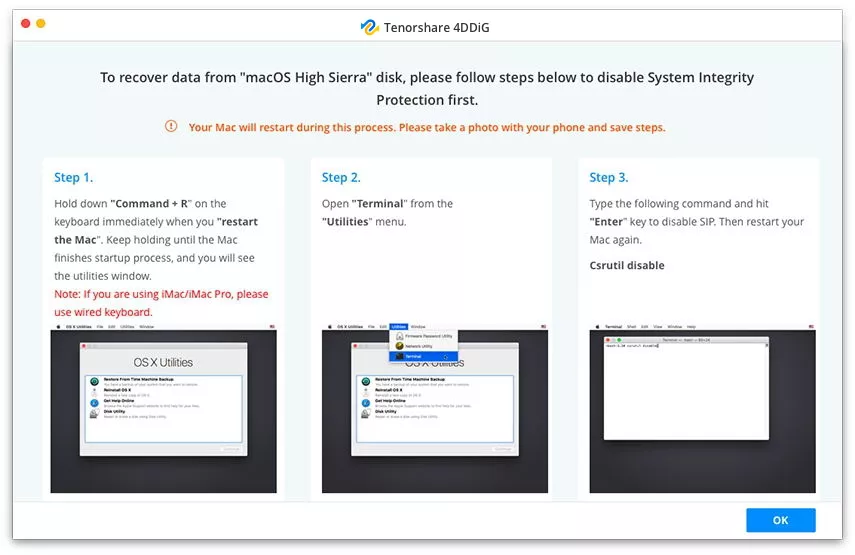
Note: If you need to recover data from macOS High Sierra and later system, you will need to disable SIP first to allow access of Mac files. Just take a photo of onscreen prompts and follow the steps.
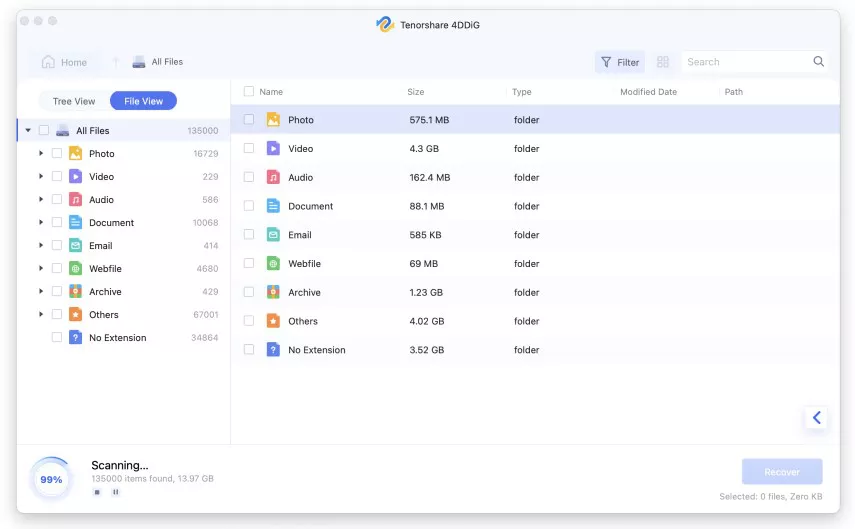
Step 2: Scan and Preview
It takes a while to scan all deleted files. After the scanning result is generated, you can click on specific file types to preview more details.
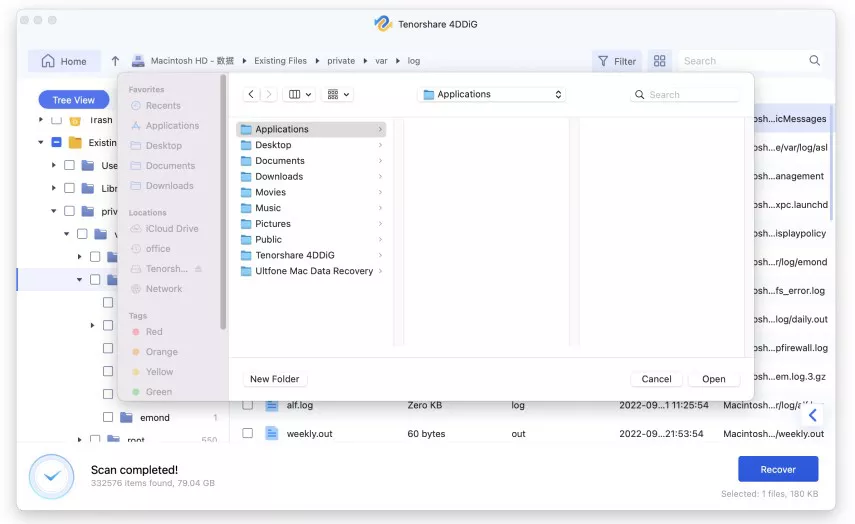
Step 3: Recover Mac Files
Click "Recover" button and select a location to save found files. It's not recommended to save the recovered files to the partition where you lost them. This may cause permanent data loss.